Summer Mini Key Lime Cheesecakes are a delightful and refreshing treat that captures the vibrant flavors of summer in every bite. I still remember the first time I tasted these bite-sized desserts at a picnic with my family. The bright, tangy lime flavor mixed with the creamy cheesecake made me feel like I was on a sunny beach, even though we were just in the backyard! People love this kind of recipe because it balances sweetness with a zesty twist, making it perfect for hot days or special celebrations. With their easy preparation and stunning appearance, these mini cheesecakes are definitely worth trying. Plus, they are small enough to enjoy without feeling too guilty, and they disappear quickly at any gathering.
Why Make This Recipe
Making Summer Mini Key Lime Cheesecakes is not just about the great taste; it’s also about the experience of creating something delicious and special. This recipe is straightforward, which means newcomers to baking can feel confident trying it. You don’t need years of kitchen experience to whip these up. The ingredients are easily found at local grocery stores. Each mini cheesecake is a perfect portion and has a creamy, dreamy filling that contrasts beautifully with the crunchy graham cracker crust.
The flavor is a big reason to make this recipe. Imagine juicy, fresh limes, blended with creamy cheese and a hint of vanilla. It feels like a mini vacation on a plate! This dessert is a showstopper at gatherings or BBQs, but it also offers a little indulgent treat when you just want something sweet at home. Finally, this recipe brings family and friends together when you showcase your baking skills. Everyone will appreciate the love you put into creating each little cheesecake!
How to Make Summer Mini Key Lime Cheesecakes
Creating Summer Mini Key Lime Cheesecakes is a beautiful process that fills your kitchen with wonderful aromas. It starts with the crust, where you mix graham cracker crumbs, brown sugar, and melted butter. The rich, buttery scent wafts through the air as you press the mixture into muffin tins. Once baked, the crust becomes slightly crispy and golden brown, setting a lovely foundation for the creamy filling.
Next comes the filling, which is where the magic happens! As you beat the cream cheese and sugar together, you can already see the silky texture forming. Adding sour cream, lime juice, and zest introduces a refreshing fragrance. Your senses will come alive as you make this vibrant filling. Once you beat in the egg, there’s a rush of excitement; you know you’re moments away from pure deliciousness.
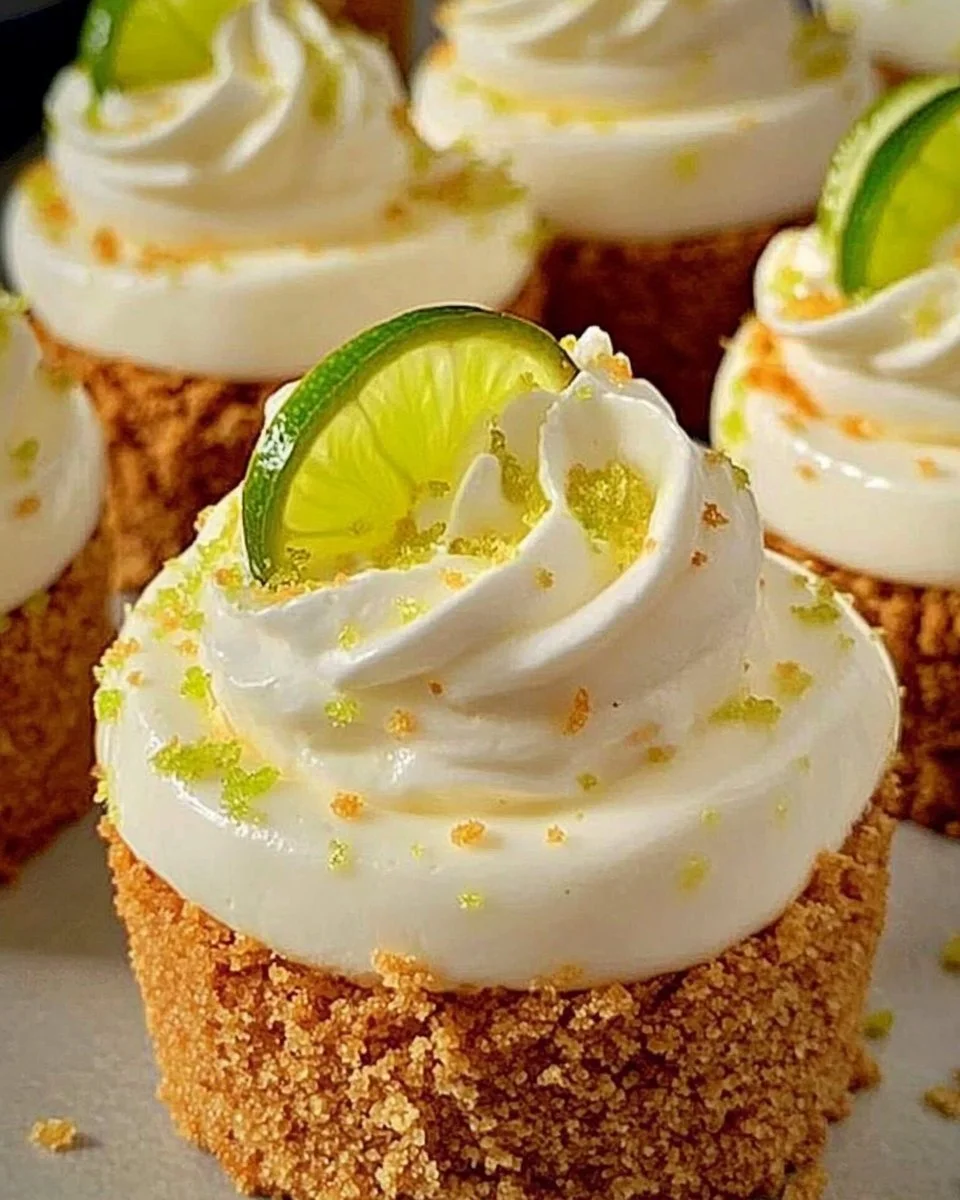
After pouring the filling over the crusts and baking them, your home will smell like a tropical getaway. Allow the mini cheesecakes to cool, and then refrigerate them to let the flavors meld. Finally, topping each mini cheesecake with whipped cream and a sprinkle of lime zest adds the finishing touch. When you serve them, everyone will be enchanted by the bright colors and the promise of delightful flavor.
Ingredients
-
1 cup graham cracker crumbs: This creates the base of your cheesecake. It gives a sweet and slightly crunchy texture that balances the creaminess of the filling.
-
2 tbsp brown sugar: The brown sugar adds a richer, deeper flavor compared to white sugar. It helps create a nice caramelized touch to the crust.
-
4 tbsp melted butter: Butter adds richness and helps to bind the crust together. It makes the crust crispy when baked.
-
8 oz cream cheese, softened: This is the star of the cheesecake filling! Cream cheese gives it that smooth, creamy texture and rich flavor.
-
1/3 cup granulated sugar: This helps sweeten the cheesecake without overpowering the tangy lime flavor.
-
1/4 cup sour cream: Sour cream adds creaminess and a slight tang that complements the lime nicely.
-
1 tsp vanilla extract: Vanilla adds warmth and depth to the flavor profile of the filling.
-
2 tbsp key lime juice: This is where the zesty flavor comes from! Key lime juice gives the cheesecakes their unique taste and a refreshing burst of citrus.
-
1 tsp lime zest: The lime zest adds an extra punch of flavor and has a lovely aroma. It enhances the overall experience of the dessert.
-
1 egg: The egg helps bind the filling together, giving it that perfect cheesecake structure.
-
Whipped cream for topping: Whipped cream adds a light and airy touch to each mini cheesecake, making them extra special.
-
Lime slices or zest for garnish: This adds a pop of color and makes the cheesecakes visually appealing.
-
Crushed graham cracker or cookie crumbs (optional): For extra decoration, these crumbs can be sprinkled on top; they add texture and more flavor if you want to get creative.
You can replace cream cheese with dairy-free cream cheese or Greek yogurt for a lighter option. If you’re looking for a gluten-free version, use gluten-free graham crackers.
Directions
Prepare Crust
-
Preheat the Oven: Start by preheating your oven to 325°F (165°C). This lets your oven get hot while you prepare everything else.
-
Mix the Crust: In a bowl, combine the graham cracker crumbs, brown sugar, and melted butter. Use a fork or a spoon to mix until everything is well-combined. It should look sort of like wet sand.
-
Press Into Muffin Tins: Line a muffin tin with paper liners for easy removal. Scoop about 1 to 1.5 tablespoons of the mixture into each muffin cup. Press the crust mixture down firmly so it sticks together well. This will give you a nice, sturdy base once it’s baked.
-
Bake the Crust: Place the muffin tin in the preheated oven and bake for about 5 minutes. Keep a close eye to make sure it doesn’t burn. Once done, set it aside to cool for a moment.
Make the Filling
-
Prepare the Filling: In a large mixing bowl, use an electric mixer to beat together the softened cream cheese and granulated sugar until the mixture is smooth and creamy. This process should take about 2 minutes, so take your time to ensure no lumps are left behind.
-
Add Aromatics and Flavor: Add the sour cream, vanilla extract, key lime juice, and lime zest into the bowl. Mix well until everything is combined. The filling should be rich and fragrant!
-
Incorporate the Egg: Finally, add in the egg. Mix gently until just combined. Remember: don’t overmix! Overmixing can make the cheesecake dense instead of light and fluffy.
Assemble and Bake
-
Pour the Filling: Carefully pour the cheesecake filling over the cooled crusts in the muffin tin. Fill each cup about 3/4 of the way—this allows space for the cheesecakes to rise slightly.
-
Bake the Cheesecakes: Place the muffin tin back into the oven and bake for 15 to 18 minutes. Keep an eye on them; you want the centers to be set but still slightly jiggly. A good test is to gently touch the top; it should feel firm but slightly springy.
-
Cool Completely: Once done, remove them from the oven. Let the cheesecakes cool in the muffin tin for about 10 minutes. Then, transfer them carefully to a cooling rack to cool completely.
-
Chill the Cheesecakes: After they have cooled, refrigerate them for at least 2 hours—or, if you’re patient, overnight. This allows the flavors to deepen and the texture to become perfect.
Decorate & Serve
-
Top with Whipped Cream: When you’re ready to serve, add a generous dollop of whipped cream on top of each cheesecake. Be creative; you can sprinkle a bit of crushed graham cracker or cookie crumbs over the whipped cream for extra texture.
-
Garnish: Finish by adding a small slice of lime or a bit of lime zest on top of each mini cheesecake. They will look beautiful and inviting!
-
Serve and Enjoy: Serve the mini cheesecakes chilled. Each bite will give you a refreshing taste of summer!
How to Serve Summer Mini Key Lime Cheesecakes
These mini cheesecakes are perfect for any occasion! They make a fantastic dessert for summer cookouts, family gatherings, and birthday parties. You can serve them as part of a dessert table along with other treats like fruit salads or brownies. They can also be the star of a picnic or beach day!
Pair these mini cheesecakes with a cool glass of lemonade or iced tea for a refreshing drink that complements their zesty flavors. For a more festive occasion, consider serving them alongside some fresh fruit, like strawberries or blueberries, to add a pop of color and a hint of sweetness.
Not only are they great for special occasions, but they’re also excellent for cozy nights in or as a treat after a busy day. Just grab one from the fridge, sit back, and enjoy a little taste of paradise!
How to Store Summer Mini Key Lime Cheesecakes
Storing your mini cheesecakes is easy. If you have leftovers (which might be hard to believe!), for best results, keep them chilled in the fridge. Place them in an airtight container to keep them fresh. They can last up to 3 days in the refrigerator.
If you want to save them longer, you can freeze them! To do this, pop them out of the muffin tin gently and wrap each mini cheesecake in plastic wrap, followed by aluminum foil. This double wrapping protects them from freezer burn. They can be stored in the freezer for up to 2 months. Just make sure to label them with the date.
When you’re ready to enjoy them again, move the cheesecakes from the freezer to the fridge to thaw overnight. This way, they’ll be creamy and delectable when you serve them.
Tips to Make Summer Mini Key Lime Cheesecakes
-
Soften Your Cream Cheese: Make sure to take your cream cheese out of the fridge at least an hour before you start. Softened cream cheese mixes much better and helps avoid lumps.
-
Don’t Overmix: Be gentle when mixing in the egg. Overmixing can cause cracks in your cheesecakes as they bake.
-
Check for Doneness: You can use a toothpick to check for doneness. Insert it gently into the center; if it comes out clean with just a few moist crumbs, they’re ready!
-
Let Cool Before Slicing: Allow the mini cheesecakes to cool completely before slicing or serving. This helps them firm up and avoids a mushy texture.
-
Chilling is Key: Don’t skip the chilling step! Refrigerating the cheesecakes for hours or overnight really enhances the flavor and texture.
Variation
-
Different Citrus Flavors: Swap out the key lime juice for regular lime, lemon, or even orange juice for a unique twist. Each option will give your mini cheesecakes a different flavor profile.
-
Chocolate Addition: For a chocolatey kick, add some melted chocolate to the filling! Just mix in about 1/4 cup of melted white or dark chocolate for a delicious chocolate lime combo.
-
Make It Gluten-Free: Use gluten-free graham crackers for the crust. This change allows everyone to enjoy the dessert without worry.
FAQs
Q: Can I make Summer Mini Key Lime Cheesecakes ahead of time?
Absolutely! These mini cheesecakes are perfect for making ahead. Just follow the recipe and store them in the fridge or freezer until you’re ready to serve.
Q: What’s the best way to reheat them?
You don’t need to reheat these cheesecakes as they taste best served chilled. Just take them out of the fridge before serving, and you can enjoy their deliciousness right away!
Q: Can I use a different cheese or flour?
If you’re looking for a different cheese, you can try using mascarpone or ricotta for a creamier texture. For the crust, you can use any crushed cookie, such as vanilla wafers, for an alternative flavor.
Now that you have everything you need to create these amazing Summer Mini Key Lime Cheesecakes, dive into the kitchen and enjoy making a delicious treat that everyone will love!
Print
Summer Mini Key Lime Cheesecakes
- Total Time: 38 minutes
- Yield: 12 servings 1x
- Diet: Vegetarian
Description
A delightful and refreshing treat capturing the vibrant flavors of summer in a bite-sized dessert.
Ingredients
- 1 cup graham cracker crumbs
- 2 tbsp brown sugar
- 4 tbsp melted butter
- 8 oz cream cheese, softened
- 1/3 cup granulated sugar
- 1/4 cup sour cream
- 1 tsp vanilla extract
- 2 tbsp key lime juice
- 1 tsp lime zest
- 1 egg
- Whipped cream for topping
- Lime slices or zest for garnish
- Crushed graham cracker or cookie crumbs (optional)
Instructions
- Preheat the oven to 325°F (165°C).
- In a bowl, mix graham cracker crumbs, brown sugar, and melted butter until combined.
- Line a muffin tin with paper liners and press the crust mixture into each muffin cup.
- Bake the crust for about 5 minutes and set aside to cool.
- In a large mixing bowl, beat together softened cream cheese and granulated sugar until smooth.
- Add sour cream, vanilla extract, key lime juice, and lime zest, mixing until combined.
- Incorporate the egg gently until just mixed.
- Pour the cheesecake filling over the cooled crusts, filling each cup about 3/4 full.
- Bake for 15 to 18 minutes, until centers are set but slightly jiggly.
- Cool in the muffin tin for 10 minutes, then transfer to a cooling rack to cool completely.
- Refrigerate for at least 2 hours before serving.
- Top with whipped cream and garnish with lime slices or zest before serving.
Notes
For a gluten-free version, use gluten-free graham crackers. You can also substitute cream cheese with dairy-free options.
- Prep Time: 15 minutes
- Cook Time: 23 minutes
- Category: Dessert
- Method: Baking
- Cuisine: American
Nutrition
- Serving Size: 1 cheesecake
- Calories: 250
- Sugar: 12g
- Sodium: 200mg
- Fat: 16g
- Saturated Fat: 8g
- Unsaturated Fat: 6g
- Trans Fat: 0g
- Carbohydrates: 28g
- Fiber: 1g
- Protein: 3g
- Cholesterol: 40mg
Keywords: cheesecake, key lime, summer dessert, mini desserts, easy recipes