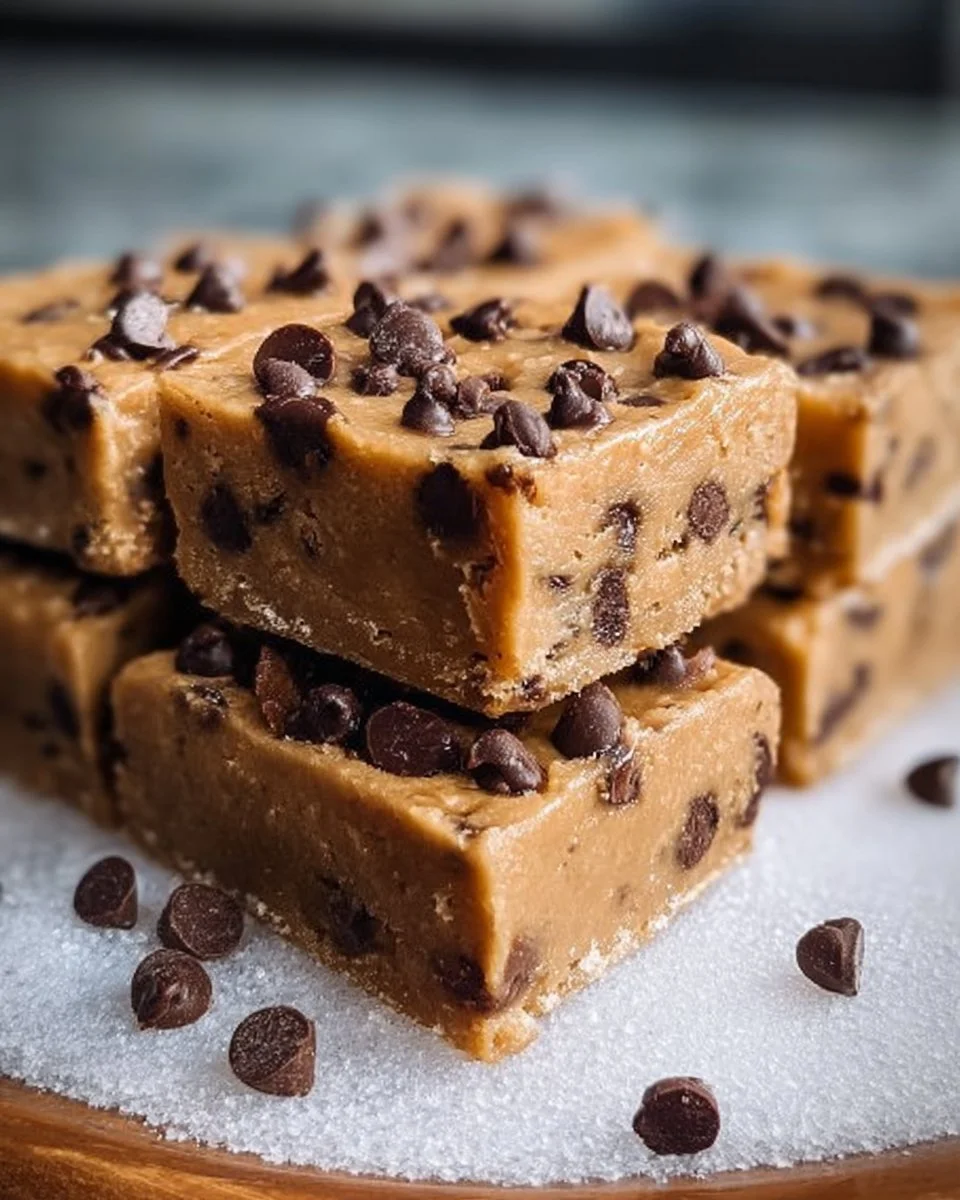
No-Bake Chocolate Chip Cookie Dough Bars are a delightful treat loved by many. They remind us of the joy of sneaking bites of cookie dough while baking cookies in the kitchen. This nostalgic recipe is popular because it combines the creamy sweetness of cookie dough with chocolatey goodness without the need for an oven. It is a great way to satisfy your sweet tooth in a quick and easy manner. The best part? You don’t have to worry about baking skills at all! Instead, you get to enjoy a rich and gooey treat, making No-Bake Chocolate Chip Cookie Dough Bars worth trying.
These cookie dough bars are perfect for family gatherings, movie nights, or just when you need something sweet at home. They are also an easy way to get kids involved in the kitchen. So grab your apron and let’s dive into the deliciousness of this simple treat!
Why Make This Recipe
What makes No-Bake Chocolate Chip Cookie Dough Bars special is their simplicity and flavor. This recipe does not require baking, making it a fun option for anyone, even those without an oven. You get to enjoy the classic taste of cookie dough without worrying about cookies burning in the oven. Plus, you can whip these up in less than 30 minutes, allowing you to spend more time enjoying your treat and less time cleaning up.
These bars are also a great way to get creative! Mixing flavors or adding toppings allows everyone to personalize their bars to suit their tastes. Whether you’re a chocolate lover or a cookie dough fan, this recipe lets you enjoy both in one delicious bite.
Furthermore, No-Bake Chocolate Chip Cookie Dough Bars bring families together. Making them is a fun activity that can involve everyone. You can gather ingredients, mix them together, and enjoy the results as a family. When you take a bite of these bars, you’ll be reminded of happy times spent with loved ones.
How to Make No-Bake Chocolate Chip Cookie Dough Bars
Making No-Bake Chocolate Chip Cookie Dough Bars is incredibly easy. The process begins with mixing the butter, sugars, and vanilla until you get a light and fluffy mixture. As you mix, enjoy the rich smell of vanilla and sweet sugar blending together. Next, you simply add the flour and sweetened condensed milk, which brings the cookie dough texture to life.
As you fold in the chocolate chips, the chocolate swirls through the dough, making it look scrumptious. The final step is to spread the mixture in a pan and let it chill in the refrigerator. While you wait, the anticipation will build, and the aroma of cookie dough will make your mouth water. Finally, once they are firm and ready, you can slice the bars into squares that look and taste amazing.
Ingredients
-
1 cup unsalted butter, softened
Butter makes the mixture creamy and adds a rich flavor to the cookie dough. -
1 cup brown sugar, packed
Brown sugar gives a deep sweetness and keeps the bars moist. -
1/2 cup granulated sugar
Granulated sugar adds sweetness and a bit of crunch to the bars. -
2 teaspoons vanilla extract
Vanilla enhances the overall flavor and gives a comforting scent. -
2 cups all-purpose flour
Flour gives the bars structure and a soft-baked texture. -
1 can (14 ounces) sweetened condensed milk
This adds moisture and a creamy consistency that makes the dough rich and delicious. -
1 cup semi-sweet chocolate chips
Chocolate chips provide that sweet chocolatey flavor we all love. -
1/2 cup mini chocolate chips (for topping)
Mini chocolate chips are perfect for decoration and extra chocolatey goodness.
You can substitute unsalted butter for coconut oil or margarine if you need a dairy-free option. For gluten-free bars, try using a gluten-free flour blend.
Directions
-
Cream the Butter and Sugars
In a large mixing bowl, combine the softened butter, packed brown sugar, and granulated sugar. Using a hand mixer or stand mixer, beat the mixture for about 2-3 minutes until it turns light and fluffy. This step is crucial because it incorporates air into the mixture, giving your bars a nice texture. -
Add the Vanilla
Next, pour in the vanilla extract. Mix it in until you can smell that warm aroma wafting through your kitchen. It’s part of what will make these bars so comforting and delicious! -
Incorporate the Flour
Gradually add the all-purpose flour to the bowl. Mix on low speed until just combined. Be cautious not to overmix—overmixing can lead to a tougher texture. Stop mixing as soon as the flour disappears into the dough. -
Add the Sweetened Condensed Milk
Slowly pour in the sweetened condensed milk. Keep mixing on low speed until the dough comes together. You may need to scrape the sides of the bowl with a spatula to make sure everything gets mixed in. -
Fold in the Chocolate Chips
Using a spatula, gently fold in the semi-sweet chocolate chips. Make sure they are evenly distributed throughout the dough. The chocolate will add bursts of sweetness in every bite! -
Prepare the Baking Pan
Line an 8×8 inch square baking pan with parchment paper, letting some paper hang over the sides. This will make it easy to take the bars out later. -
Transfer the Dough to the Pan
Spoon the cookie dough mixture into your prepared baking pan. Use a spatula to spread and press the mixture evenly, creating a flat and even layer. The dough will feel soft and creamy as you press it down. -
Add Mini Chocolate Chips
Sprinkle the mini chocolate chips over the top of the pressed dough. Gently press them in so they stick. This extra layer of chocolate is a delightful surprise when you bite into the bars! -
Chill the Bars
Cover the baking pan with plastic wrap and place it in the refrigerator for at least 2 hours. This chilling time is essential! It ensures that the bars firm up enough for slicing. -
Cut and Serve
Once the bars are firm, lift the entire block out of the pan using the parchment paper overhang. Place it on a cutting board and slice it into squares or rectangles. -
Store Leftovers
You can serve them immediately or store any leftovers in an airtight container in the refrigerator for up to one week.
How to Serve No-Bake Chocolate Chip Cookie Dough Bars
You can enjoy these No-Bake Chocolate Chip Cookie Dough Bars in several delightful ways. They are great on their own as a sweet dessert after dinner or a snack during the day. You might even want to serve them with a glass of cold milk, enhancing that nostalgic cookie dough experience.
For a fun twist, consider topping the bars with a scoop of vanilla ice cream, drizzling hot fudge over the top, or serving with fresh strawberries. These bars are also perfect for celebrations like birthday parties or holiday gatherings. Guests will be impressed with your no-bake creation, and the bars make for a delightful addition to dessert tables.
How to Store No-Bake Chocolate Chip Cookie Dough Bars
Storing your No-Bake Chocolate Chip Cookie Dough Bars is simple! After they have chilled and you have enjoyed a few slices, any leftovers can be covered and stored in an airtight container. Keep them in the refrigerator for up to one week.
If you want to keep them longer, you can also freeze the bars. Cut them into squares before freezing, and stack them between layers of parchment paper in an airtight container or freezer bag. This will help keep them from sticking together. When you want to enjoy one, just pull a piece out, let it sit at room temperature for a few minutes, or pop it in the microwave for a quick warming to enjoy the gooeyness!
Tips to Make No-Bake Chocolate Chip Cookie Dough Bars
Here are some helpful tips to ensure your No-Bake Chocolate Chip Cookie Dough Bars turn out perfectly:
-
Use Softened Butter: Make sure your butter is at room temperature so it blends well with the sugars. This will result in a creamier texture.
-
Don’t Overmix: Mixing too much can make the bars dense rather than light and soft. Mix just until you see all ingredients combined.
-
Chill Properly: Don’t skip the chilling step! It’s important for the bars to hold their shape when you cut them.
-
Use Parchment Paper: Lining the baking pan with parchment paper not only makes for easy removal but also helps to keep the bars from sticking to the pan.
-
Taste As You Go: Since there’s no baking involved, feel free to taste the dough before chilling. It’s a great way to adjust sweetness!
Variation
Here are a few variations to personalize your No-Bake Chocolate Chip Cookie Dough Bars:
-
Nutty Twist: For nut lovers, add 1/2 cup of chopped walnuts or pecans for an extra crunchy texture.
-
Cookies and Cream: Swap some of the chocolate chips for crushed Oreo cookies to create a cookies and cream version.
-
Healthy Option: Substitute the all-purpose flour with almond flour or oat flour for a gluten-free option. You can also use coconut or agave sweeteners instead of granulated sugar for a healthier option.
FAQs
Q: Can I make No-Bake Chocolate Chip Cookie Dough Bars ahead of time?
A: Yes! You can prepare these bars a day or two in advance. Just make sure they are well chilled in the refrigerator. They will stay fresh for up to a week.
Q: What’s the best way to reheat it?
A: If you like your bars a little warm, you can microwave a piece for 10-15 seconds. This will create the melted chocolate feel without compromising the overall taste.
Q: Can I use a different flour?
A: Absolutely! As mentioned earlier, you can use gluten-free flour or alternative flours like almond or coconut flour. Just be sure to check the moisture content as it may vary from regular all-purpose flour.
In conclusion, No-Bake Chocolate Chip Cookie Dough Bars are not only simple to make, they capture the delightful experience of indulging in cookie dough. With their sweet flavor and creamy texture, they are bound to be a favorite for both kids and adults alike. So why not give this recipe a try? You might just create new memories in the kitchen!
Print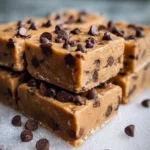
No-Bake Chocolate Chip Cookie Dough Bars
- Total Time: 120 minutes
- Yield: 16 servings 1x
- Diet: Vegetarian
Description
A delightful no-bake treat that combines creamy cookie dough with chocolate chips, perfect for satisfying your sweet tooth without baking.
Ingredients
- 1 cup unsalted butter, softened
- 1 cup brown sugar, packed
- 1/2 cup granulated sugar
- 2 teaspoons vanilla extract
- 2 cups all-purpose flour
- 1 can (14 ounces) sweetened condensed milk
- 1 cup semi-sweet chocolate chips
- 1/2 cup mini chocolate chips (for topping)
Instructions
- Cream the butter and sugars together until light and fluffy.
- Add the vanilla extract and mix until well incorporated.
- Gradually add the flour and mix on low speed until just combined.
- Pour in the sweetened condensed milk and mix until the dough comes together.
- Fold in the semi-sweet chocolate chips until evenly distributed.
- Line an 8×8 inch baking pan with parchment paper.
- Transfer the dough to the pan and press it down evenly.
- Sprinkle mini chocolate chips on top and gently press them in.
- Cover and chill in the refrigerator for at least 2 hours until firm.
- Once firm, lift the bars out of the pan and cut into squares.
Notes
For a dairy-free option, substitute the butter with coconut oil or margarine. For gluten-free bars, use a gluten-free flour blend.
- Prep Time: 15 minutes
- Cook Time: 0 minutes
- Category: Dessert
- Method: No-Bake
- Cuisine: American
Nutrition
- Serving Size: 1 square
- Calories: 220
- Sugar: 15g
- Sodium: 150mg
- Fat: 10g
- Saturated Fat: 6g
- Unsaturated Fat: 4g
- Trans Fat: 0g
- Carbohydrates: 28g
- Fiber: 1g
- Protein: 2g
- Cholesterol: 30mg
Keywords: no-bake, cookie dough, dessert, chocolate, easy recipe